docker创建容器
1
2
| nvidia-docker run -it --net=host --shm-size 6G -v /home/MiaoMiaoYang:/MiaoMiaoYang miaomiaoyang/pytorch:v12
## --shm-size 指定容器内存的大小
|
docker apt 提示 Operation not permitted
https://blog.csdn.net/zhou920786312/article/details/119713645
设置privileged为true完全获得root权限
docker run -it –privileged=true centos:7.7.1908 bash
中文编码
1
2
| export LANG=C.UTF-8
source /etc/profile
|
多显卡运行程序
CUDA_VISIBLE_DEVICES=0,1 XXX
Ubuntu 镜像服务站
1
2
3
| cp /etc/apt/sources.list /etc/apt/sources.list.bak
vim /etc/apt/sources.list
apt-get update
|
https://mirrors.tuna.tsinghua.edu.cn/help/ubuntu/
pip 镜像服务站
https://mirrors.tuna.tsinghua.edu.cn/help/pypi/
pip config set global.index-url https://pypi.tuna.tsinghua.edu.cn/simple
计算文件数
传输文件
1
2
| scp local_file remote_username@remote_ip:remote_file
scp -r local_folder remote_username@remote_ip:remote_folder
|
断点续传
1
2
| apt-get install rsync
rsync --partial --progress -e ssh /path/to/local/file user@remote:/path/to/remote/file
|
–partial 实现断点续传
–progress 显示传输进度
MD5
Ubuntu 版本
显示网速
1
2
| apt-get install nload
nload -u H
|
tar
tar 仅打包
1
2
3
4
| ## 打包
tar -cvf code.tar.gz *.* m* r*
## 解压
tar -xvf code.tar.gz
|
tar.gz 压缩打包
1
2
3
4
| ## 打包压缩
tar -zcvf code.tar.gz *.* m* r*
## 解压到当前目录下
tar -zxvf code.tar.gz
|
终端代理
教程:
https://zhuanlan.zhihu.com/p/46973701

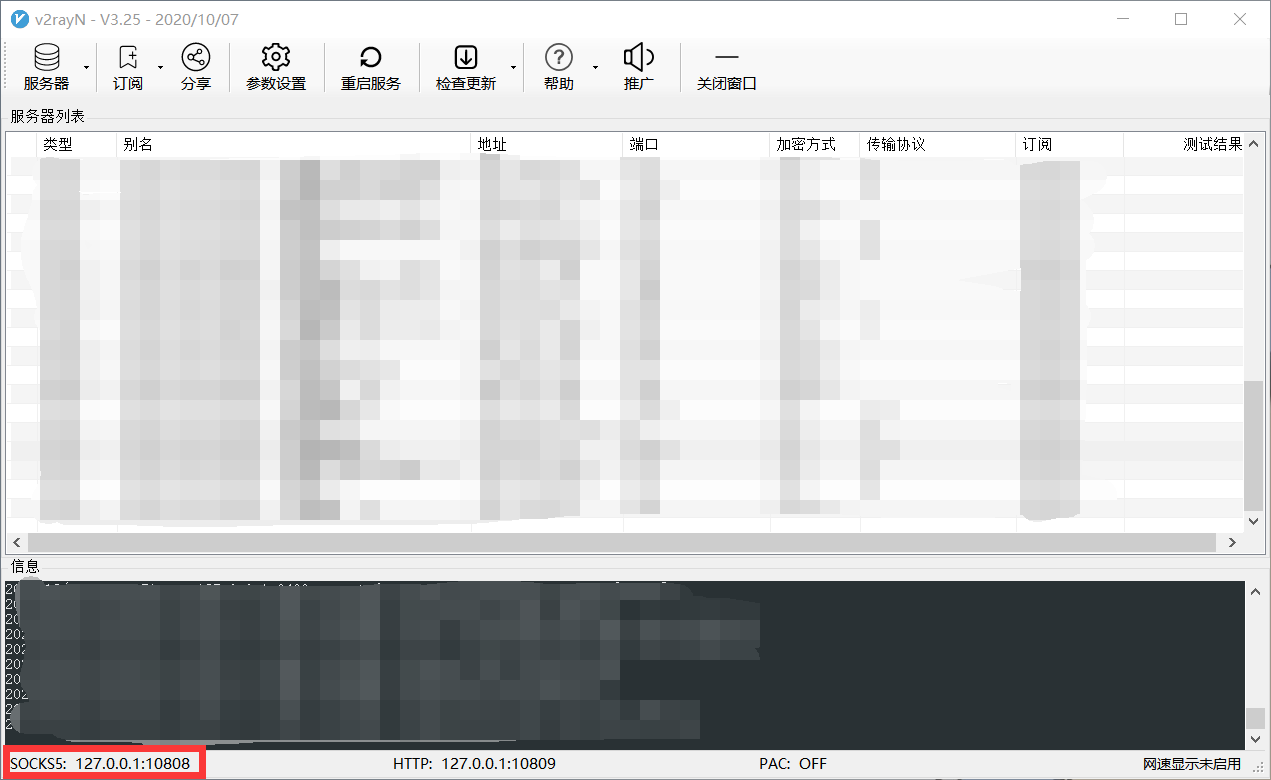
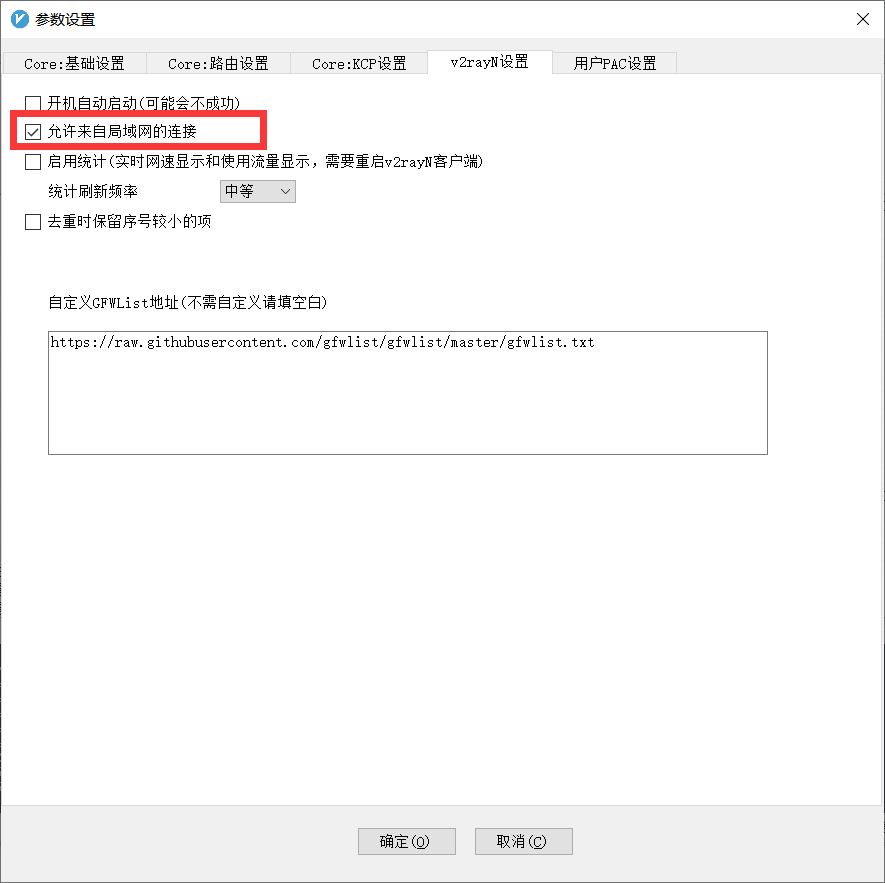
在本机上打开代理,打开局域网连接的选项,找到代理的地址:SOCKS5,找到本机在局域网的ip地址


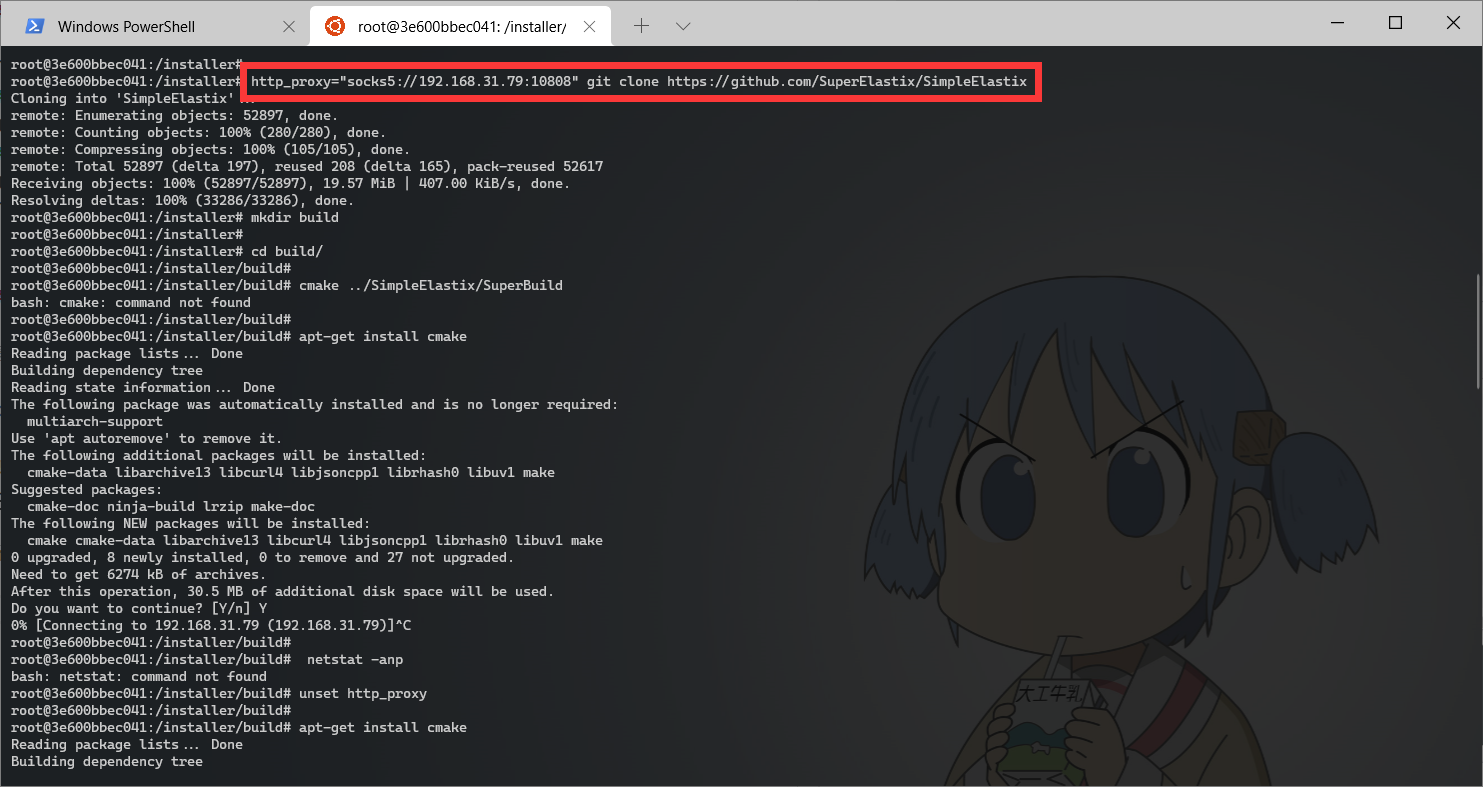
通过http_proxy命令进行ip终端代理
1
| all_proxy="socks5://192.168.31.79:10808" make -j4
|
Ubuntu 应用开机自启
https://zhuanlan.zhihu.com/p/98804785
Ubuntu 18.04之后使用systemd管理系统,systemd默认读取[/etc/systemd/system]目录下的配置文件,并链接到[/lib/systemd/system/]目录下的脚本文件
- 所以想要设置开机自启动,就需要修改启动脚本:
1
2
3
| cd /lib/systemd/system
ls -lh
sudo vim rc.local.service
|
在末尾添加[Install]字段 (rc.local.service文件没有的话就新建一个):
 1
 2
 3
 4
 5
 6
 7
 8
 9
10
11
12
13
14
15
16
17
18
19
20
21
22
23
| # This file is part of systemd.
#
# systemd is free software; you can redistribute it and/or modify it
# under the terms of the GNU Lesser General Public License as published by
# the Free Software Foundation; either version 2.1 of the License, or
# (at your option) any later version.
# This unit gets pulled automatically into multi-user.target by
# systemd-rc-local-generator if /etc/rc.local is executable.
[Unit]
Description=/etc/rc.local Compatibility
ConditionFileIsExecutable=/etc/rc.local
After=network.target
[Service]
Type=forking
ExecStart=/etc/rc.local start
TimeoutSec=0
RemainAfterExit=yes
[Install]
WantedBy=multi-user.target
Alias=rc-local.service
|
- 创建rc.local监本,并添加执行权限
1
2
3
| sudo touch /etc/rc.local
# 重要!!
sudo chmod a+x /etc/rc.local
|
- 在[/etc/systemd/system]目录下创建软链接
1
| ln -s /lib/systemd/system/rc.local.service /etc/systemd/system/
|
在rc.local脚本中添加开机自启动的内容
测试reboot
Linux 命令别名
在~/.bashrc文件(用户配置文件)中修改:
1
2
3
4
| alias work='cd /mnt/cache/ga/MiaoMiaoYang/VesselSeg/; conda activate miao-torch'
alias data='cd /mnt/petrelfs/ga/'
alias pid='squeue | grep ga'
alias nv='WatchNV(){ swatch -n $1 nv always;};WatchNV'
|
其中 nv 表示了带参数的命令的写法
Device or resource busy 查找文件占用进程
rm -rf .ps_00000097*
rm: cannot remove ‘.ps_000000978eec4c0100000088’: Device or resource busy
rm: cannot remove ‘.ps_000000979b8e2f0100000089’: Device or resource busy
使用以下命令查找进程
1
2
| lsof | grep <设备或资源名>
# lsof | grep .ps_000000979b8e2f0100000089’
|
分割文件
https://deepinout.com/linux-cmd/linux-file-process-cmd/linux-cmd-split.html
按照大小将大文件分割成若干小文件
1
| split -b 10G <file> PREFIX
|
split 参数:
-a:指定输出文件名的后缀长度,默认为2个(aa,ab...)

-d:指定输出文件名的后缀用数字代替

-b:指定输出文件的最大字节数,如1k,1m...

-C:指定每一个输出文件中单行的最大字节数

-l:指定每一个输出文件的最大行数
合并文件
1
| cat splog* > newLog.log
|
Kill程序后显卡仍然占用
查找占用的僵尸程序
查找占用的僵尸程序,并全部杀掉
1
| fuser -v /dev/nvidia* |awk '{for(i=1;i<=NF;i++)print "kill -9 " $i;}' | sh
|
rsync 拷贝文件
要在Linux系统中将整个目录中除了.pth文件和.log文件以外的所有文件复制到另一个目录,你可以使用rsync命令。假设要将目录/source/dir中除了.pth文件以外的所有文件复制到/destination/dir,可以使用以下命令:
1
2
3
4
5
6
| rsync -av --exclude='*.pth' --exclude='*.log' /source/dir/ /destination/dir/
# -a 表示以递归方式复制文件,并保持所有文件属性。
# -v 表示详细输出。
# --exclude='*.pth' 表示排除所有以.pth为扩展名的文件。
# /source/dir/ 是源目录路径。
# /destination/dir/ 是目标目录路径。
|
CUDA_HOME
1
| export CUDA_HOME=/usr/local/cuda-X.X
|
flash_attention_2


