最终还是向conda低头了,hhh。主要是需要多版本的python,还是conda集成环境轻松一些
Miniconda的安装
选择合适的版本,提供了 Quick command line install
如果上面忘记勾选,可以后续将 XXX\miniconda3\Scripts 路径添加到环境变量中,这样可以不用conda init就可以在shell中交互了 (conda init会导致每次使用powershell都启动conda,很慢,有的时候其实不需要conda)
- 同样,也不推荐使用conda init,这样每次打开powershell都会进入conda环境中,特别慢,想到了一个办法
Miniconda的配置
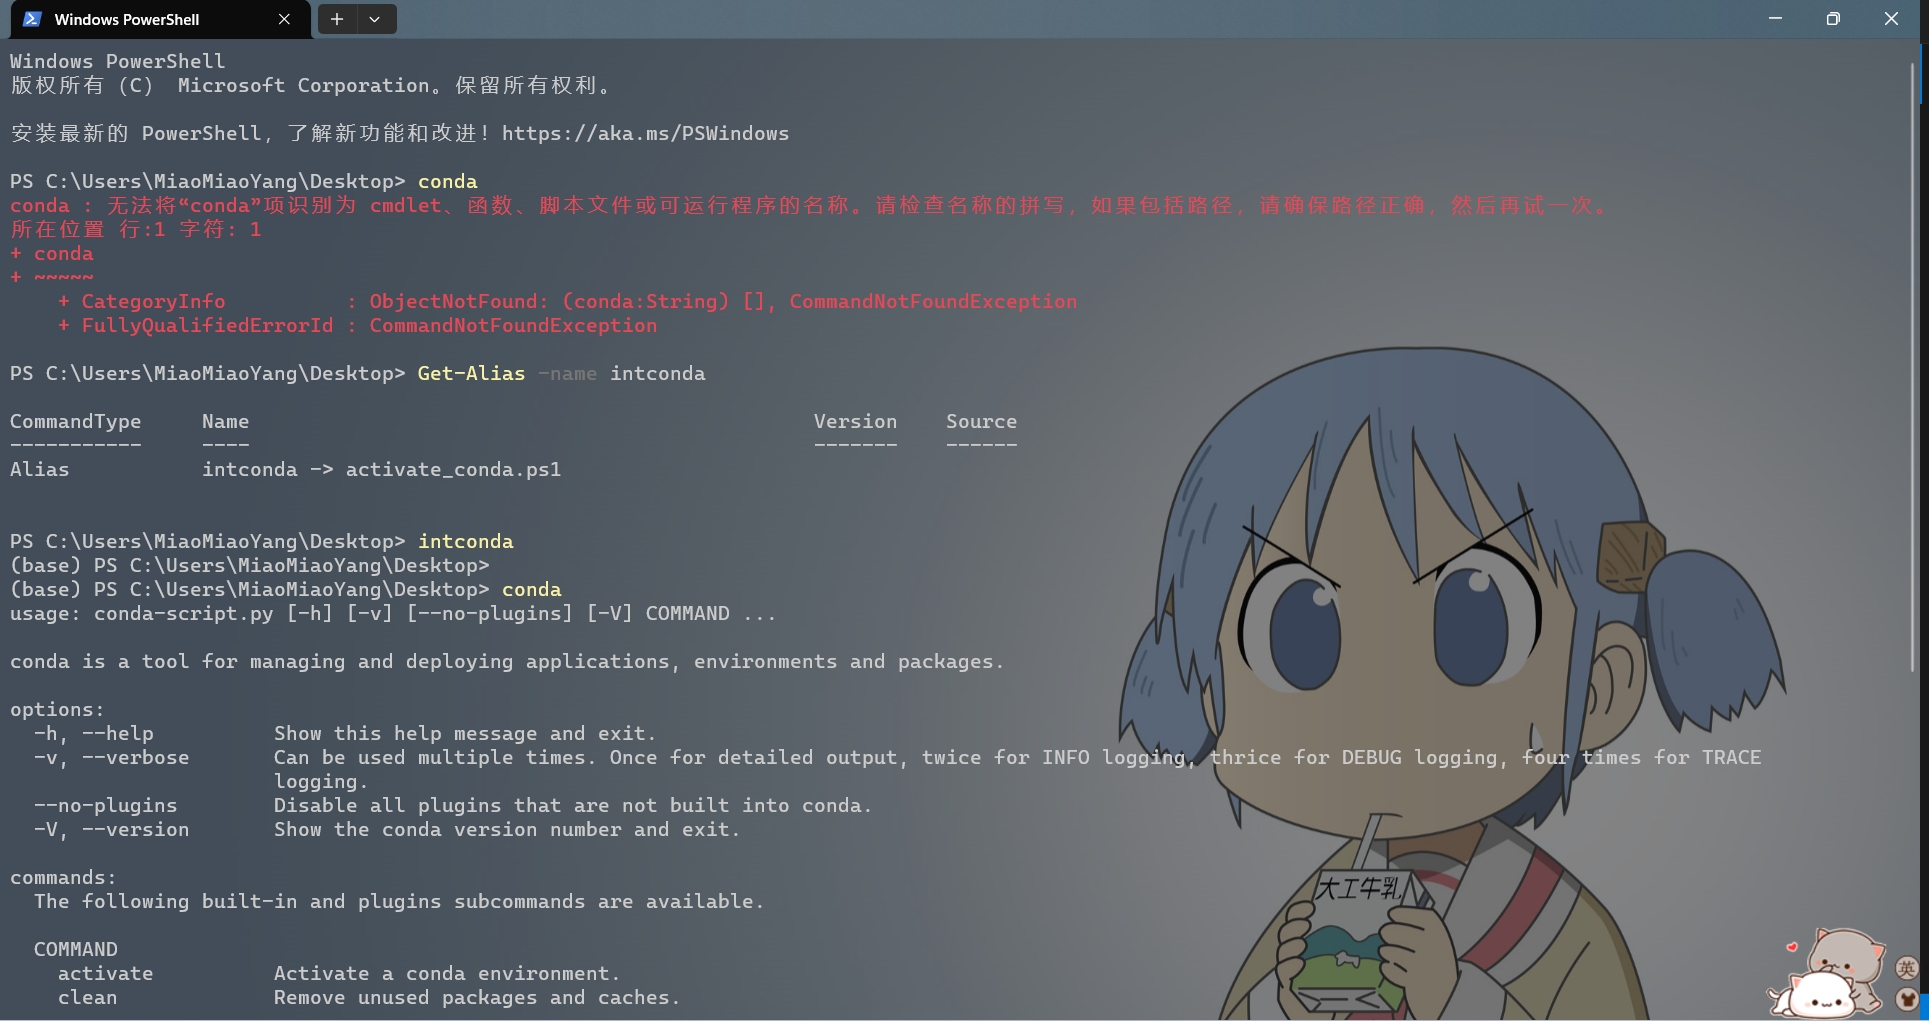
首先,如果上面没有勾选添加到环境变量这个选项,这个时候打开powershell是无法输入命令conda来启动的,因为找不到conda的路径
使用 powershell 进入 miniconda/Scripts 文件夹,对powershell进行conda初始化 (因为一般在powershell中使用conda,这里也可以选择cmd.exe / bash 等)
1
2
3
| .\conda.exe init powershell
## ……
## modified C:\Users\username\Documents\WindowsPowerShell\profile.ps1
|
这个时候如果再打开powershell,会自动初始化conda,进入base环境,但是这样每次打开powershell都会特别慢,而且不是每次都需要conda环境
所以找到上述 profile.ps1 的位置,profile.ps1 这个其实就是powershell的启动脚本,会把这里面的东西执行一遍,也就是启动conda环境
我把上述文件中关于conda的内容拷贝到了miniconda目录中,重命名为activate_conda.ps1,而原始的 profile.ps1 关于conda的内容就删去,这样再新建powershell窗口就不会启动 conda 了
1
2
3
4
5
6
7
| # activate_conda.ps1
#region conda initialize
# !! Contents within this block are managed by 'conda init' !!
If (Test-Path "D:\install\miniconda3\Scripts\conda.exe") {
(& "D:\install\miniconda3\Scripts\conda.exe" "shell.powershell" "hook") | Out-String | ?{$_} | Invoke-Expression
}
#endregion
|
那么,准备在powershell中以别名的方式启动conda,找到 profile.ps1,修改为:
1
| Set-Alias -Name intconda -Value D:/install/miniconda3/activate_conda.ps1
|
这样的话,powershell加载别名会比加载整个conda环境要快许多

.condarc是conda应用程序的配置文件,在用户家目录(windows:C:\users\username\),用于管理镜像源。如果不存在,则打开conda的,执行一下:
1
| conda config --set show_channel_urls yes
|
在.condarc文件中,配置虚拟环境默认安装位置, (windwos默认安装了C:\Users\username.conda中)
1
2
3
4
| envs_dirs:
- D:\install\miniconda3\envs
pkgs_dirs:
- D:\install\miniconda3\pkgs
|
conda源:
1
2
3
4
5
| # 添加清华源的pytorch
conda config --add channels https://mirrors.tuna.tsinghua.edu.cn/anaconda/pkgs/free/
conda config --add channels https://mirrors.tuna.tsinghua.edu.cn/anaconda/pkgs/main/
conda config --add channels https://mirrors.tuna.tsinghua.edu.cn/anaconda/cloud/pytorch/
conda config --set show_channel_urls yes
|
 1
 2
 3
 4
 5
 6
 7
 8
 9
10
11
12
13
14
15
16
17
18
19
20
| ## 清华源 https://mirrors.tuna.tsinghua.edu.cn/help/anaconda/
channels:
- https://mirrors.tuna.tsinghua.edu.cn/anaconda/cloud/pytorch/
- https://mirrors.tuna.tsinghua.edu.cn/anaconda/pkgs/main/
- https://mirrors.tuna.tsinghua.edu.cn/anaconda/pkgs/free/
- defaults
show_channel_urls: true
default_channels:
- https://mirrors.tuna.tsinghua.edu.cn/anaconda/pkgs/main
- https://mirrors.tuna.tsinghua.edu.cn/anaconda/pkgs/r
- https://mirrors.tuna.tsinghua.edu.cn/anaconda/pkgs/msys2
custom_channels:
conda-forge: https://mirrors.tuna.tsinghua.edu.cn/anaconda/cloud
msys2: https://mirrors.tuna.tsinghua.edu.cn/anaconda/cloud
bioconda: https://mirrors.tuna.tsinghua.edu.cn/anaconda/cloud
menpo: https://mirrors.tuna.tsinghua.edu.cn/anaconda/cloud
pytorch: https://mirrors.tuna.tsinghua.edu.cn/anaconda/cloud
pytorch-lts: https://mirrors.tuna.tsinghua.edu.cn/anaconda/cloud
simpleitk: https://mirrors.tuna.tsinghua.edu.cn/anaconda/cloud
deepmodeling: https://mirrors.tuna.tsinghua.edu.cn/anaconda/cloud/
|
 1
 2
 3
 4
 5
 6
 7
 8
 9
10
11
12
13
14
15
| ## 阿里源
channels:
- defaults
show_channel_urls: true
default_channels:
- http://mirrors.aliyun.com/anaconda/pkgs/main
- http://mirrors.aliyun.com/anaconda/pkgs/r
- http://mirrors.aliyun.com/anaconda/pkgs/msys2
custom_channels:
conda-forge: http://mirrors.aliyun.com/anaconda/cloud
msys2: http://mirrors.aliyun.com/anaconda/cloud
bioconda: http://mirrors.aliyun.com/anaconda/cloud
menpo: http://mirrors.aliyun.com/anaconda/cloud
pytorch: http://mirrors.aliyun.com/anaconda/cloud
simpleitk: http://mirrors.aliyun.com/anaconda/cloud
|
一启动conda环境中,默认进入base环境,但是很多时候不需要base环境
1
2
| conda config --show | grep auto_activate_base
conda config --set auto_activate_base False
|
不过还是启动Base环境吧,base无法删除,启动了可以提示进入了conda了
环境激活
 1
 2
 3
 4
 5
 6
 7
 8
 9
10
11
12
13
14
15
16
17
18
19
20
21
22
23
24
25
26
27
28
| ## 创建一个新环境
## conda create -n [env名字] python=[版本号]
## conda create --prefix=[环境地址] python=[版本号]
conda create -n foo python=3.5
conda create --prefix D:/foo python=3.5
## 导出环境;根据环境创建环境
conda env export > environment.yml
conda env create -f environment.yml
## 使用命令查看当前拥有的虚拟环境
conda info --envs
# 激活环境
conda activate foo
# 检查python版本
python -V
# 使用pip安装一个库
pip install requests
# 离开当前环境
conda deactivate foo
# 删除环境
conda remove --name foo --all
conda remove --prefix D:/foo --all
|
不使用conda init前提下,直接激活环境
python 环境
建议进入Conda环境后使用 pip
conda install 网速慢,而且没搞懂和base环境之间的联系
1
2
3
4
5
| ## 阿里镜像源
pip config set global.index-url https://mirrors.aliyun.com/pypi/simple/
## 设置pip缓存位置
pip config set global.cache-dir "D:/install/pip_cache"
|
CUDA 环境
1
| conda install cuda -c nvidia
|
1
| export CUDA_HOME=/usr/local/cuda-X.X
|
